
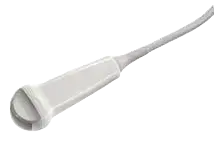
If your Chison E7W-V is producing degraded images, failing probe tests or showing physical damage, this page helps you judge what is likely wrong and whether a repair makes sense before you commit to a replacement.
| Manufacturer | Chison |
|---|---|
| Model | E7W-V |
| Probe type | Endocavity array |
| Frequency reference | 4.0–12.0 MHz |
| Typical applications | OB/GYN, Urology |
| Compatible systems | Chison SonoBook 6, Chison SonoBook 8, Chison SonoBook 9 |
| Source record | The Ultrasound Source product record |
In service the E7W-V is most often found on Chison SonoBook 6, Chison SonoBook 8, Chison SonoBook 9. Console-side settings and module revisions still vary, so the exact system build is part of any assessment.
For endocavity heads such as the E7W-V, reprocessing chemistry is the main enemy – seal integrity and lens condition decide service life more than the electronics do.
Common failure modes for the E7W-V
Match what you are seeing against the table below. The right-hand column reflects how faults of this kind typically assess – the actual verdict always depends on the individual probe.
| What you see | Likely cause | Typically repairable? |
|---|---|---|
| Strain relief pulling away from the cable or gone rigid | Flex fatigue where the cable meets the probe or connector | Usually repairable |
| Intermittent signal that changes as the cable moves | Broken internal conductors in the cable | Case by case |
| Bubbles or lifting at the lens face | Lens delamination from the acoustic stack | Usually repairable |
| Pin damage or corrosion visible in the connector | Connector damage from forced insertion or drops | Usually repairable |
| Cracked or dented housing | Impact damage; housing can usually be replaced or resealed | Usually repairable |
| Dark bands or dropout lines in the image | Element dropout, or a conductor break inside the cable | Case by case |
| Latch or locking hardware damaged on the connector shell | Broken locking mechanics on the connector housing | Usually repairable |
| Fluid found inside the probe head after a leak test | Seal failure allowing disinfectant ingress | Case by case |
| Failed electrical leakage test | Compromised sealing on an endocavity probe | Case by case |
Check these before you ship the probe
- Examine the connector for bent or corroded pins, cracks and a working locking mechanism.
- Flex the cable gently along its length while imaging – intermittent dropout points to broken conductors.
- Check the strain reliefs at both ends for splits, stiffness or separation from the cable.
- Photograph the complete manufacturer label – the exact revision matters for parts compatibility.
- Compare penetration and uniformity against a known-good probe on the same preset.
- Have the probe leak-tested before further use – fluid ingress worsens quickly and creates a patient-safety issue.
Repair, exchange or replace — which applies to your E7W-V
Whether a E7W-V is worth repairing depends on the damage scope: localized lens, cable, strain relief and connector faults are routine repairs, while widespread element loss usually is not economical. An exchange unit can bridge the gap when downtime matters, and replacement becomes rational when repair cost approaches replacement value. A written assessment settles this per probe – condition, not model, decides it.
What we need to quote your E7W-V repair
- A clear photo of the complete manufacturer and model label on the probe
- A description of the fault: what you see on screen and when it started
- The ultrasound system (console) the probe is used with
- Screenshots or photos of the image problem, if the fault is visual
- Photos of any physical damage – lens, housing, cable or connector
Product imagery on this page is representative of the E7W-V probe family and is not a photograph of your specific unit. This page does not claim OEM authorization or universal compatibility. Repair feasibility, turnaround and commercial terms are confirmed in writing after assessment of the actual probe.


