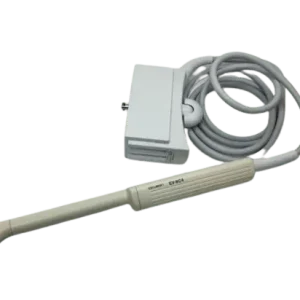
A failing GE ATR does not always mean buying a new probe. Use the fault table below to match what you are seeing on screen to a likely cause, then check what a repair assessment would need.
| Manufacturer | GE |
|---|---|
| Model | ATR |
| Probe type | Endocavity array |
| Compatible systems | GE LOGIQ 200, GE LOGIQ 200 Pro |
In service the ATR is most often found on GE LOGIQ 200, GE LOGIQ 200 Pro. Console-side settings and module revisions still vary, so the exact system build is part of any assessment.
Endocavity probes like the ATR live through high-level disinfection cycles that attack seals and the lens; fluid ingress is the fault that ends most of them, which is why leak testing matters.
Common failure modes for the ATR
Match what you are seeing against the table below. The right-hand column reflects how faults of this kind typically assess – the actual verdict always depends on the individual probe.
| What you see | Likely cause | Typically repairable? |
|---|---|---|
| Strain relief separated, split or stiff | Cable flex fatigue at the probe or connector end | Usually repairable |
| Cable jacket cracked, wrinkled or discolored | Jacket wear; conductors may still be intact underneath | Usually repairable |
| Connector lock broken or hardware missing | Mechanical damage to the connector shell | Usually repairable |
| Bent, broken or corroded connector pins | Connector damage from forced insertion or drops | Usually repairable |
| Image cuts out when the cable is flexed | One or more conductors broken inside the cable bundle | Case by case |
| Fuzzy or noisy image that cleaning does not fix | A worn lens surface or elements beginning to degrade | Case by case |
| Depth performance clearly below what this probe used to deliver | Reduced acoustic output from element ageing or a delaminating lens | Case by case |
| Fluid found inside the probe head after a leak test | Seal failure allowing disinfectant ingress | Case by case |
| Failed electrical leakage test | Compromised sealing on an endocavity probe | Case by case |
Check these before you ship the probe
- Photograph the complete manufacturer label – the exact revision matters for parts compatibility.
- Check the strain reliefs at both ends for splits, stiffness or separation from the cable.
- Examine the connector for bent or corroded pins, cracks and a working locking mechanism.
- Compare penetration and uniformity against a known-good probe on the same preset.
- Run the system’s built-in probe test or element check if your console provides one.
- Have the probe leak-tested before further use – fluid ingress worsens quickly and creates a patient-safety issue.
Repair, exchange or replace — which applies to your ATR
Three paths apply to a failing ATR: repair (typical for lens, housing, cable and connector damage), exchange (fastest route back to scanning) or replacement (when the acoustic stack is too far gone). The deciding factors are how much of the array still fires, whether the housing is intact and what downtime costs you. Each probe is judged on its actual condition.
What we need to quote your ATR repair
- A clear photo of the complete manufacturer and model label on the probe
- A description of the fault: what you see on screen and when it started
- The ultrasound system (console) the probe is used with
- Screenshots or photos of the image problem, if the fault is visual
- Photos of any physical damage – lens, housing, cable or connector
Images shown are representative and are not photographs of an individual unit. Nothing on this page claims OEM authorization or guarantees universal fit. Whether a specific ATR can be repaired, and on what terms, is confirmed in writing once the probe has been assessed.